Valentine’s Day has passed, but we’re still playing with hearts. We actually made a paper-heart garland for a backdrop we’ll be using at our Bridal Open House on Sunday, February 26th. We thought this inexpensive project would be great for engagement parties, bridal showers, and even your wedding day.
Here’s how we made our paper heart garland:
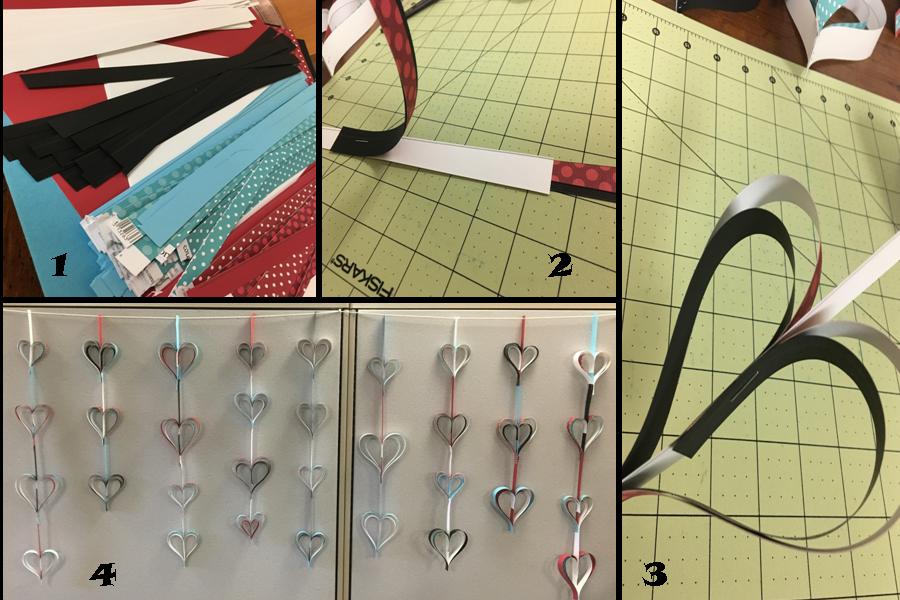
Step 1: The MOST time-consuming step ever! I used a ruler and lined my paper, but if you feel comfortable without lines you can skip this. You’ll need to cut your paper length-wise into strips. I used about 8-10 sheets of paper.
Step 2: You’ll need to pick your “stem.” I stuck with solid-colored paper because it has color on both sides, whereas printed paper only has a pattern on one side. Then choose two strips of different paper and line them up with the stem (remember, some of the pieces will be backwards until we shape the strips into the heart). With the strips of paper lined up against the stem, staple the bottom ends of your strips of paper to the stem.
Step 3: Bend the free ends of your two strips of paper downward. As you do, they’ll bow into a heart shape—and this is where you can get creative. Strips of different lengths create different sizes and shapes, so have fun with this part. Whenever you’re happy with the look of your heart, staple the free ends of your strips of paper to the stem. (I cut the extra paper on the bottom so it didn’t have a tail.) This gives you the first half of your heart.
Step 4: Repeat on the opposite side of the stem so your hearts have a second half.
Step 5: Once you have a nice collection of hearts, then start stapling the stems to the bottom of other hearts to make your chain. Play with different sizes and colors.